Many people decide to migrate a website to WordPress because of the large number of user-friendly features of the platform. They also get the chance to use various third-party services with their interface for free or minimal costs. One such service is MailChimp, a powerful and convenient email marketing platform that can be easily integrated with the CMS. In this article, we are presenting a simple procedure to setup a WordPress newsletter with MailChimp. An email newsletter is one of the best marketing and communication tools for connecting with the target audience. It lets website owners engage their users by informing them of the latest developments as well as market products. Following are the steps which WordPress website owners can use to create a newsletter with MailChimp:
Steps To Setup A WordPress Newsletter With MailChimp
1. Sign Up And Create a New Email List
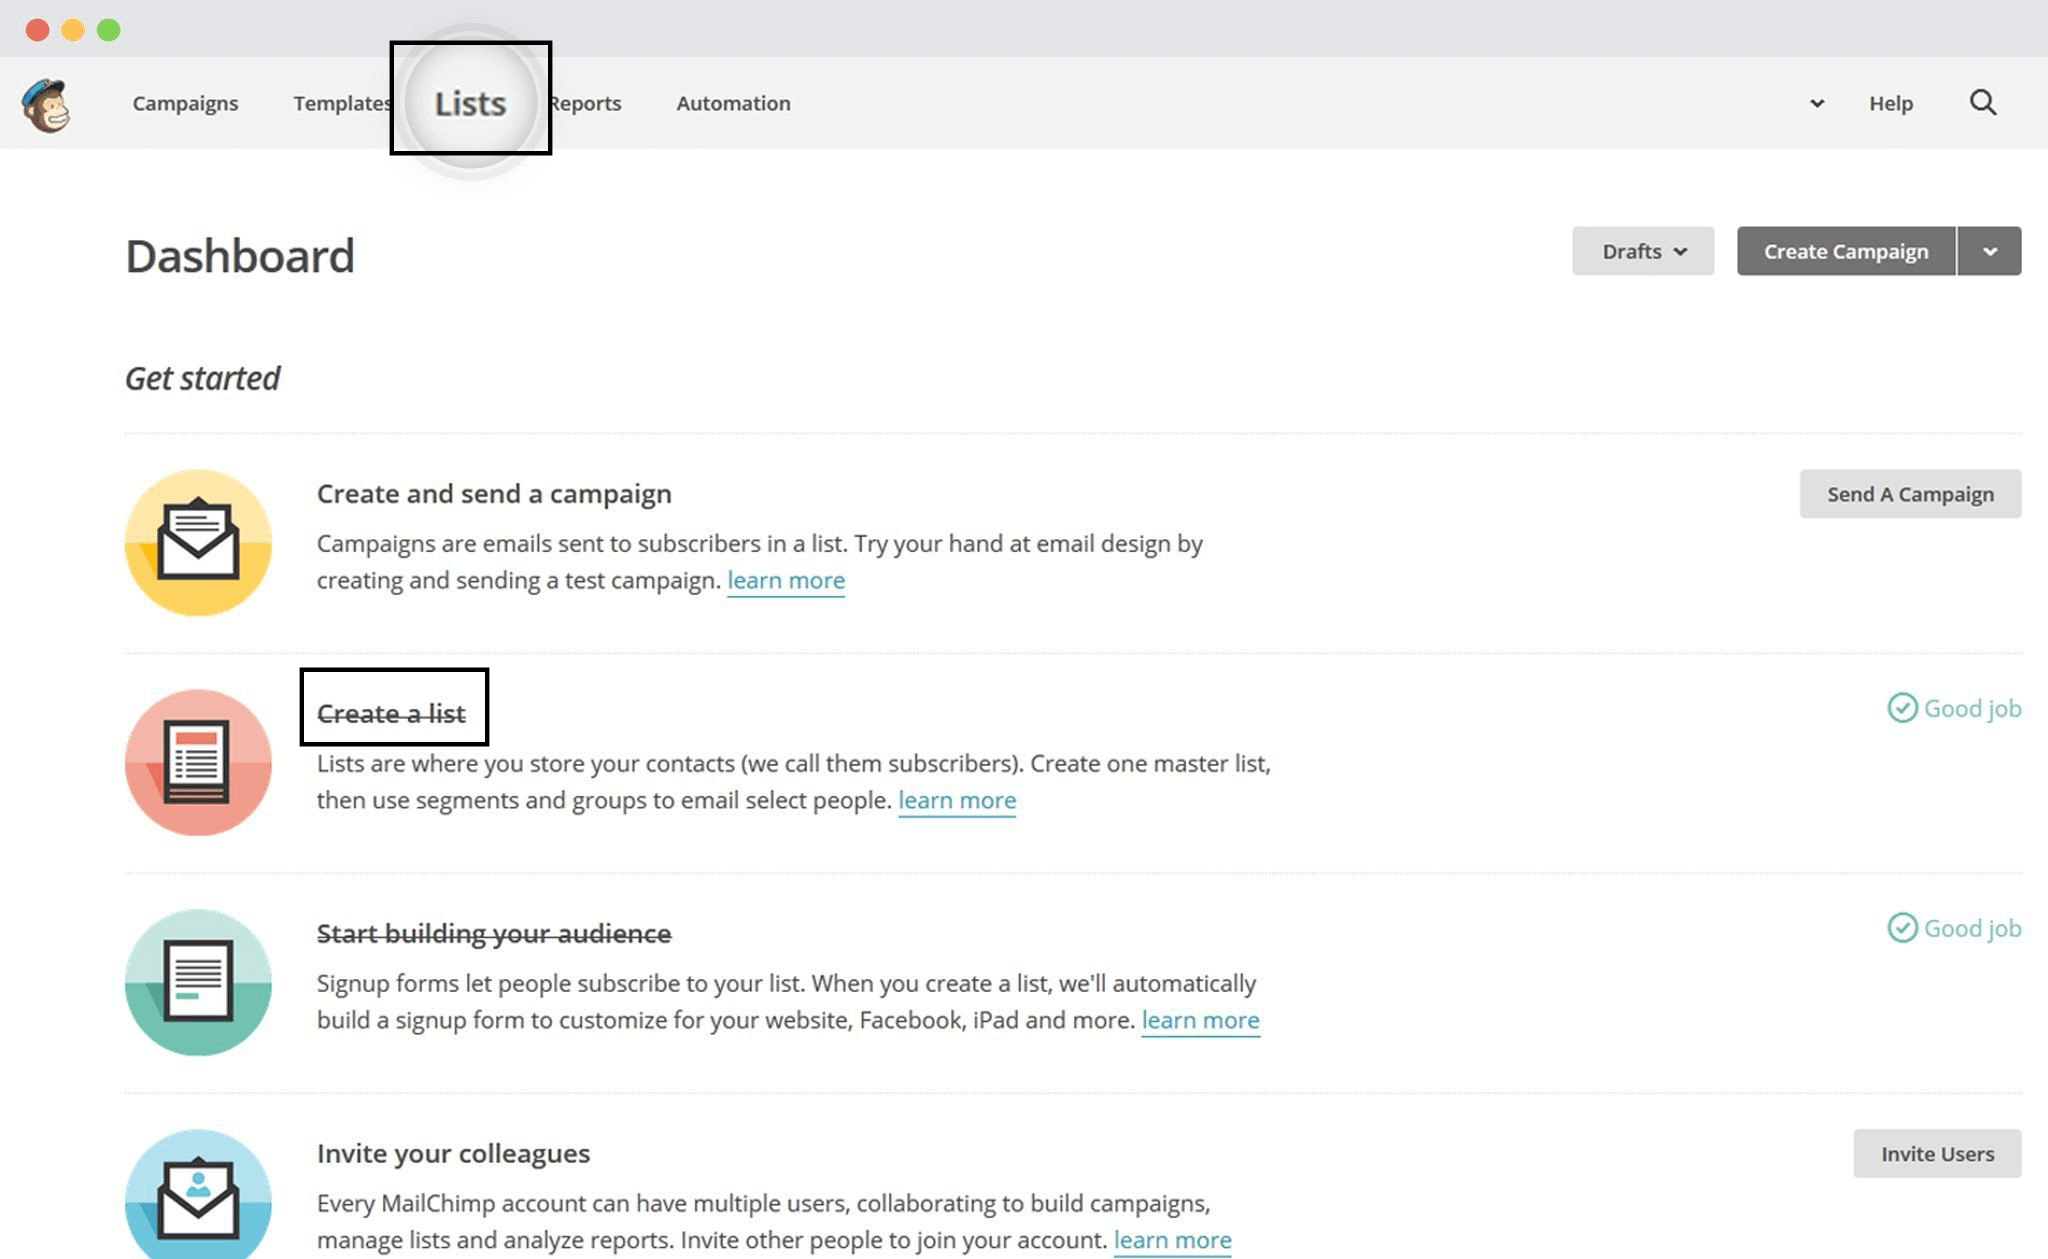
Go to the MailChimp website and sign up for free. You will need to provide an email ID and create a username and password for the service. Remember that MailChimp is free until you are creating a list having not more than 2000 subscribers. Once this figure is crossed, users have to choose a paid plan to continue. After successfully creating the account, you will be directed to the MailChimp dashboard from where you manage the account. The first task is to create a list. Click on the “Lists” tab and you will see an option for the purpose on the page.
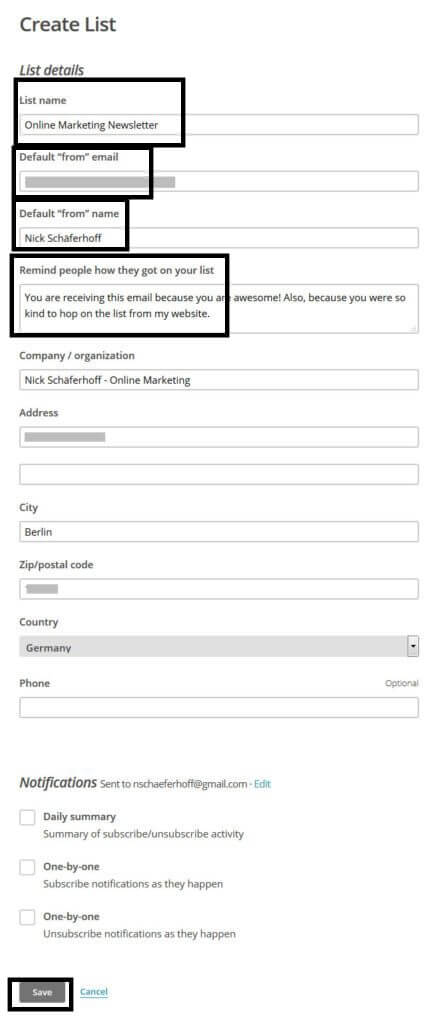
Once you select the “Create a list” option, you will be directed to the next screen for customizing the list. Enter the name for the new list in the given field. In the image given below, we have chosen “Online Marketing Newsletter” as the preferred name. The next field is called Default “from” email. The ID entered in this field will be displayed as the sender’s email in the recipient’s inbox. Similarly, insert a preferred “from” name in the specified field. Do not forget to fill the “Remind people how they got on your list” section. This will enable people to recognize you and not classify the email as spam. Fill in other details and click “Save”.
2. Create A Subscription Form
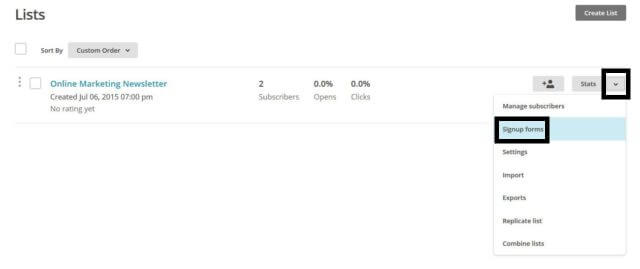
The next step is to build a signup form which will appear on your website. Visitors can use this form to subscribe to the newsletter. The new list that you created in the first step will now be visible in the “Lists” section. There will be a dropdown menu on the right-hand side against the name of the list. Select the “Signup forms” option from the menu.
You will now be directed to the next screen where four options are provided, namely- general forms, embedded forms, subscriber popup, and form integrations. Choose the embedded forms option. This will be helpful in adding the form through a widget to the website. You can go to the form builder through the link provided in the menu and choose the form fields. Configure the settings and copy the given code.
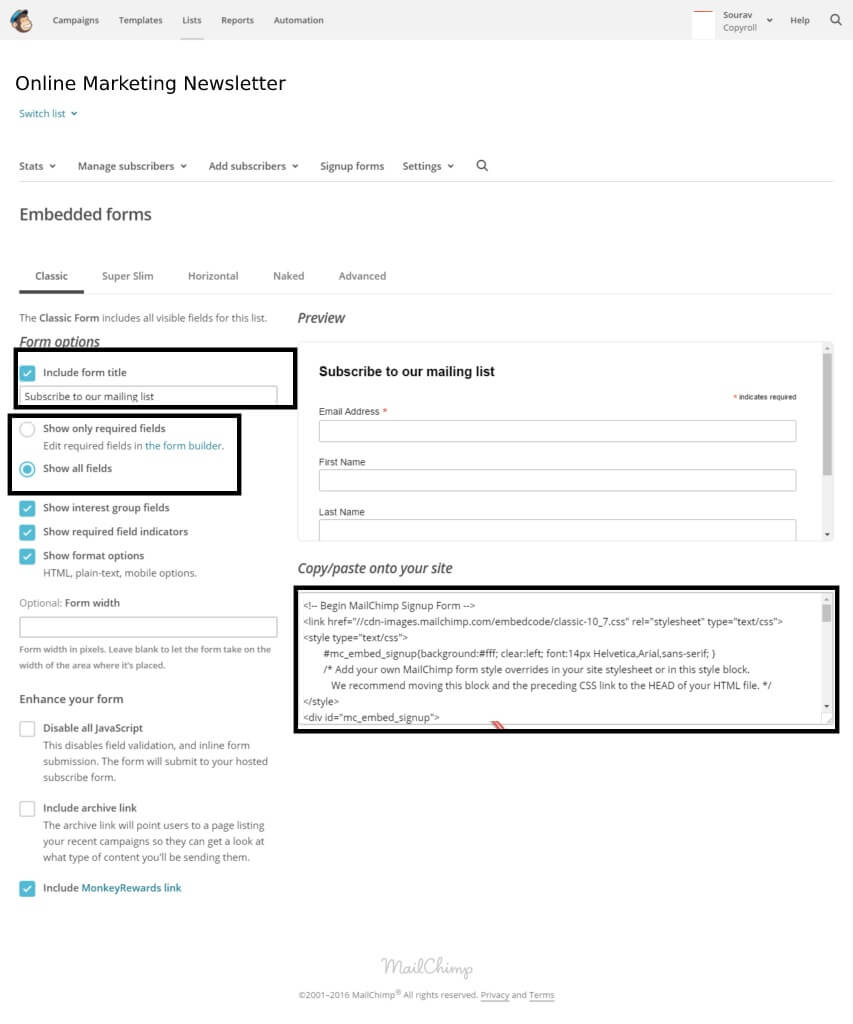
You can choose the form fields according to the information you require. You can add sections for accessing name, email or postal address, contact number etc. There are also options for styling and you can choose a color scheme and fonts for the new form. This will be helpful in integrating the form with the design of the website. There is also the facility for spam protection in the form of reCAPTCHA.
3. Using Widgets To Add The MailChimp Newsletter
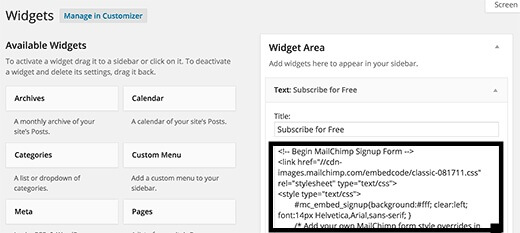
In order to setup a WordPress newsletter with MailChimp, you now need to access the dashboard of your website installation. Use the WordPress username and password to log on to the control panel and go to Appearance > Widgets. Now add a text widget to the sidebar of the interface. Paste the signup form code that you had copied in the above step in the chosen widget. Your MailChimp subscription form will now be visible on the selected location on the interface.
4. Integrating MailChimp With WordPress Through Plugin
Plugins are one of the most beneficial features of the open-source platform. WordPress users can easily extend the functionality of their interface through these tools. MailChimp can also be integrated into a WordPress website through a plugin. Access the admin dashboard and go to “Plugins> Add new”. Search for the MailChimp for WordPress plugin and install it on the interface. When you activate the plugin, it will ask you to provide an API key. This key will help in connecting your MailChimp account with the interface. Log on to your MailChimp account and click on the dropdown menu next to the username. Select the “Account” option and go to “Extras”. You will find the option for API keys. Select it to access the key and copy the code.

Paste the code in the given field in the WordPress dashboard and save the changes. You can now make all the desired changes from your website control panel.
Conclusion
This easy method to set up a WordPress newsletter with MailChimp gives website owners the advantage of using a robust tool to market their products or services and build up the engagement with their target audience.
About Author:
Brandon graves have been working as an experienced WordPress expert at HireWPGeeks Ltd – Leading WordPress web development company in the USA. He handles all projects with his team of expert developers. He is a passionate blogger and loves to share her knowledge with a large community of WordPress.