YouTube and Social media platforms such as Facebook and Instagram have become important platforms for sharing and watching videos. You may have seen many popular videos of professionals and wondered how they did it with perfection. Well, besides talent, they take advantage of professional video editor and video-making software. You can find various video-making tools like Filmora, MiniTool MovieMaker, Windows Movie maker, etc. But many people don’t know how to use them, so in this article, I’m going to show you how to create professional videos with the Movie maker tool.
As I said earlier there are many video-making tools available so here I’m going to use MiniTool MovieMaker to edit and create professional Videos.
How To Edit Videos Through MiniTool MovieMaker
Before editing the video in MiniTool MovieMaker, you have to install the MiniTool MovieMaker on your laptop or computer. Also, you must have installed the latest version of MiniTool MovieMaker 5.3. Besides this, also make sure that you have your raw video ready in the supported video format and resolution. In MiniTool MovieMaker 5.3, you can edit and export files up to 1080p. Once this is done, let’s start creating your very first professional video.
Step 1: Import Video Files Into MiniTool MovieMaker
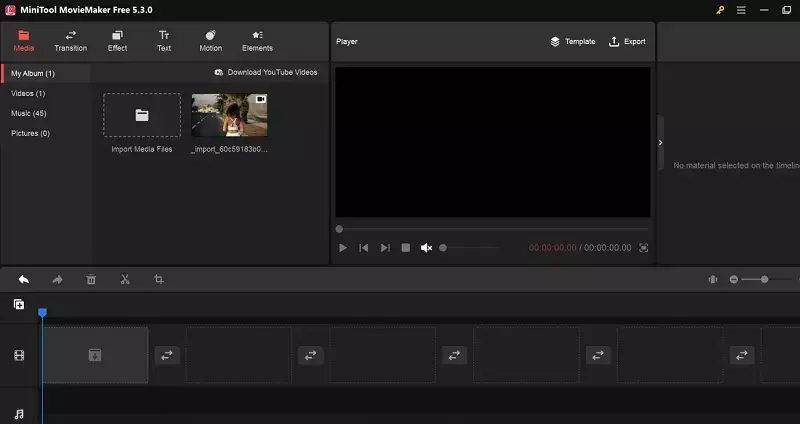
First, open the MiniTool MovieMaker and select the video file you want to edit, then import it into MiniTool MovieMaker. You can click on the Import Media File button and add your targeted Videos. Also, you can see all your imported files in the top left corner. Once you have the files selected, we can proceed to the second step.
Step 2: Trim/Cut/Merge Videos
When you are editing a video, you will need to trim, cut, or remove unwanted parts from the raw files. Also, sometimes you need to combine several clips into one or split the raw files into many smaller sections. For this step, add your imported video file to the timeline.
To trim any video part that you do not want in the final version, pick the starting frame of the unwanted part and click the Split button. Now go to the end frame of the unwanted part you want to remove and click Split again. Select the unwanted video segment, and hit the delete button or select delete from the context menu. Furthermore, you can do it as many times as you want, and if you by mistake deleted any required segment tap the Ctrl+z to get it back.
Step 3: Add Transitions, Visual Effects, And Elements
Once you have all the trim clips ready, now it is time to add transitions to them to make them whole. You can locate the Transition effect options at the top left corner of the MiniTool Movie Maker. Hit the transition button, this will show you various different transition effects with previews.
You can choose anyone you like and to your video. You need to select the segment and add your selected transition. MiniTool MovieMaker does the rest of the work. You can check how the transition effects look in your video by hitting the play button.
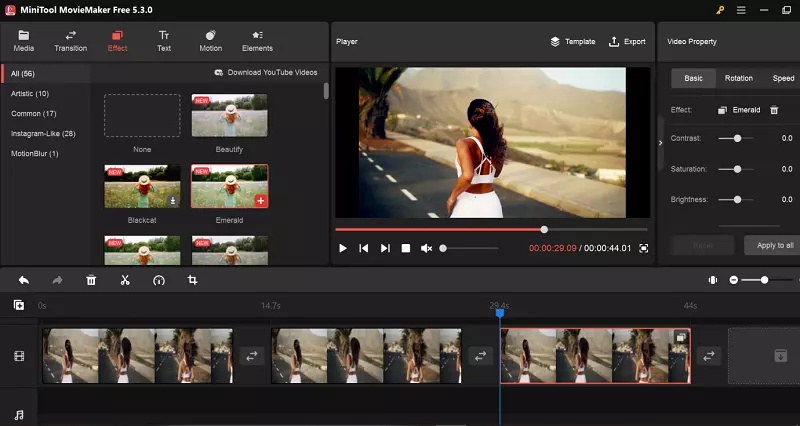
Right next to Transitions, you can find the Visual Effects options. Applying effects, overlays and filters work almost in the same way. First, select the clip for the effect, choose your visual effect, and apply it. Just like the Transition, you can also check the preview of the visual effects.
Step 4: Add/Edit/Mute Audio
If you want to add new music to your video, just the music file and add it to the timeline. However, if you already have audio in your clip and still want to add new audio, you should consider muting or decreasing the audio volume of the clip audio. Select the video clip and go to the Edit panel, then mute or reduce the audio by dragging the volume slider to the left end. If you want to mute all the clips, select all the clips and mute them.
Once you have adjusted the volume on the clips, you can add new audio to your video. After importing the new audio file, you can also adjust its volume, speed, etc.
Step 5: Add Text To Video
In many scenarios, you need to add text or a title. MiniTool MovieMaker lets you add various types of text or titles freely. Right next to the Effects you can find the Text option. Here, you will see 3 Options that allow different types of text to video: Caption, Credits, and Title.
With Caption, you can add different text to the video frames. With Credits, you can add end text or credits at the end of the video. Besides this, with the Title, you can add various stylish text at the beginning of the video.
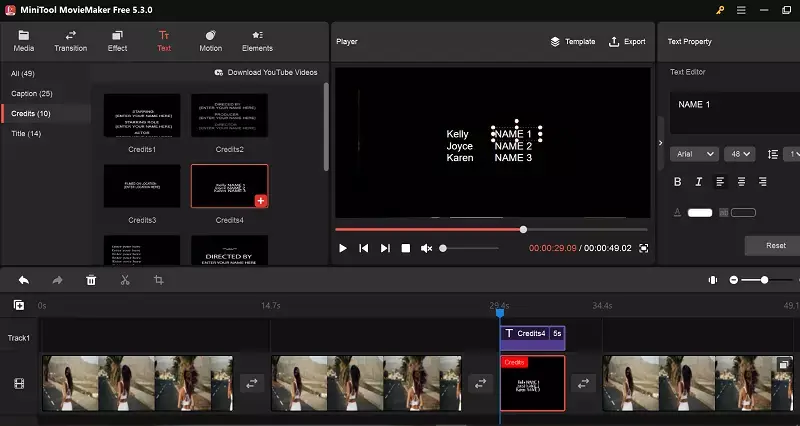
Now select the type of text ( Caption, Credits, and Title) you want to add and enter your text. You can edit the text effect, change the text outline size, and text duration, apply text visual effects, and more.
Step 6: Export and Save The File
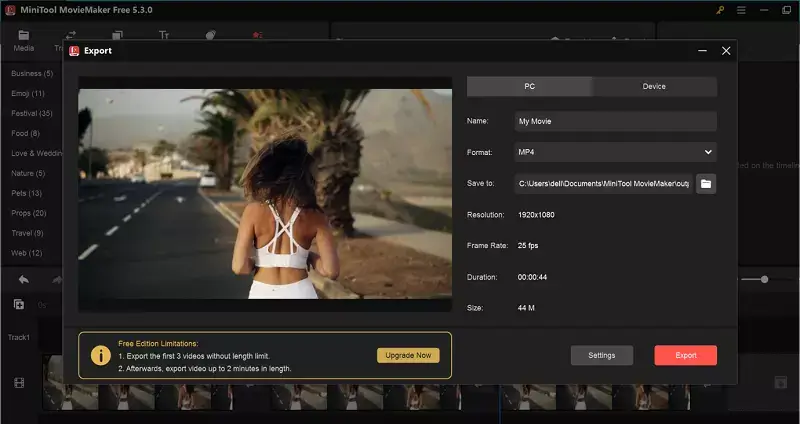
Once you have done with all the editing and are satisfied with your final product, you can export the video by clicking on the Export button in the top right corner. After clicking the Export button, you can select the file destination where you want to save the file and change its name, resolution, quality, frame rate, etc. You can also save the video in different formats with different resolutions. After exporting the video, you can find your file on the target location and publish it anywhere you want.
Conclusion: Create Professional Videos With The Movie Maker Tool
No wonder the trend of creating and sharing videos on various platforms has become so popular as it can be a good source of earning. With these 6 Steps, you can edit your video with almost any Movie Maker. So Download MiniTool MovieMaker or other video editing software, give it a try and create your very own professional video.
 free html design Free html design templates
